Wednesday, January 31, 2007

Hold it! Back up!

I don't know why I try to kid myself...I hate eggplant. Why did I put it on my menu this week, or ever really? I'll tell you why - because so much of my tastes have changed over the past few years, that I thought I might like it just a little bit.

As soon as I started to slice the eggplant, I knew this dinner was not happening. I forced myself to go through the motions, and as soon as I threw it in the oven, I proclaimed "We are going out!" Nathan was like, "Huh?!" I threw the whole dish into the garbage. (I know, I know - there are starving children in Africa...)

Thinking about that gorgeous vegetable made me want to hurl. I can't explain it.

The next time you see me attempt anything with eggplant in it - stop me! Sometimes I'm just overtaken by the beauty of it all.

Monday, January 29, 2007

Perfection

Over the weekend, I caught Bobby Flay, and his new show "Throwdown with Bobby Flay." Basically, Bobby Flay (not my favorite Food Network chef/personality) drops in on an unsuspecting home cook, and challeges them in a culinary smackdown of their "signature" dish. Sometimes Bobby wins, sometimes the home cook brings home the gold. Somewhat entertaining, in small doses.

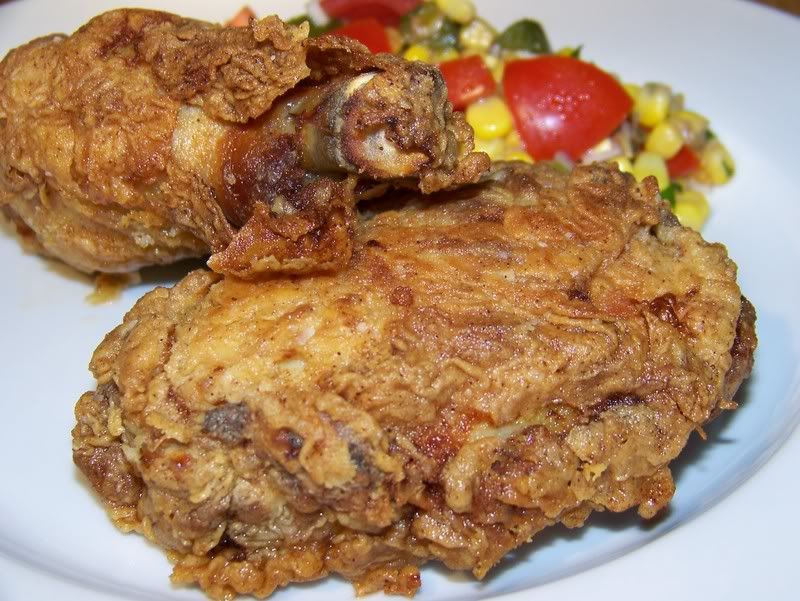
Anyway, the episode I saw was all about fried chicken! I was salivating. I knew then and there that I would be making fried chicken this week...it's been way too long since I licked my fingers clean. *grin*

The only fried chicken I had growing up was made by the one-and-only Colonel Sanders. (I still crave those god-awful FAKE mashed potatoes!) I only even attempted to my own fried chicken about 2 years ago, to bring on a picnic with my hunny. It was not a great success. However, my second time was a charm and now, I don't understand why you would want to spend $10.00 on a bucket of "chicken" when you can make it yourself for the price of a fryer bird - - that's about $2.64 where I live!

FRIED CHICKEN

1 fryer chicken, cut up (or have the meat counter or butcher do it for you)
1 pint of buttermilk
4 cups of flour
2 tbsp paprika
2 tbsp salt
1 tbsp freshly cracked black pepper
1 tsp cayenne pepper (optional)
8 cups of vegetable oil

Cut up chicken. In a large bowl, add chicken and all of the buttermilk. Cover and return to the refridgerator for a good 12-24 hours. (Don't skip this part!!!! The buttermilk breaks down the proteins in the chicken and leaves it super moist and tender!)

Place flour in a food storage bag. Add paprika, salt and peppers.

Heat oil in a large, wide skillet/stockpot to 350 degrees, or until a drop of water "dances" on the surface. Take out a piece of the buttermilk covered chicken, and drop into flour mixture. Shake to completely cover chicken. Drop service side down into the hot oil. Do not overcrowd your skillet!!!! It will drop the temperature of the oil, and make your chicken soggy. Cook approximately 10-12 minutes per side, or until golden brown. If you are browning too fast, your oil is too hot. Adjust the temperature - or else you will have a nice golden skin and raw meat. Place cooked chicken on a wire rack over a cookie sheet to drain any excess oil.

TIP: If you have a food thermometer, check to make sure your internal temperature reaches a safe 180 degrees. Or, do as I do and take out a little extra insurance...preheat your oven to 400 degrees, and throw those fried chicken pieces in for about 10 minutes! Sure, it's cheating...but at least you won't get salmonella poisoning!

Serve! And, remember - it's great the next day cold.

Weekly menu planning

Sunday - Beef Wellington with Zucchini Gratin
Monday - Fried Chicken with Corn Salad
Tuesday - Eggplant Parmesan Bake with Baby Lettuces
Wednesday - BBQ Meatballs over Rice and Candied Carrots
Thursday - Chickpea Pasta
Friday - Pizza Day!
Saturday - Take me out...please! I deserve it!

Saturday, January 27, 2007

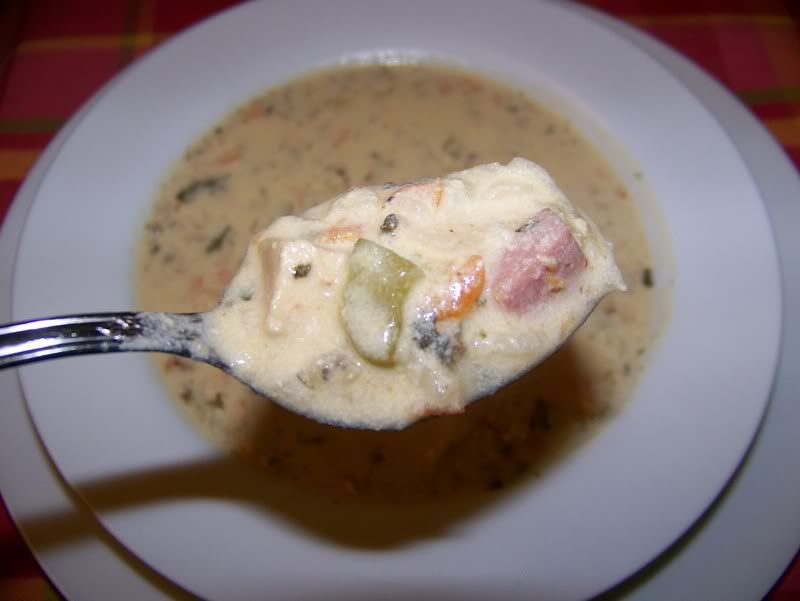
Northwood Wild Rice Soup

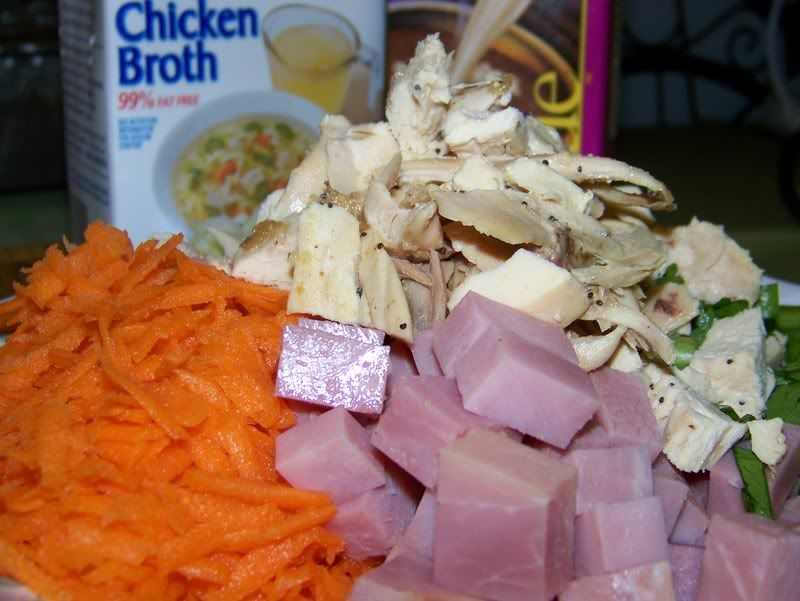
This soup does a wonderful job of cleaning out my refrigerator. That's all the introduction it needs!


NORTHWOODS WILD RICE SOUP


3 cups of cooked wild rice

2 cups of cooked chicken, cubed

1 cup cooked ham, cubed

2 carrots, shredded

2 stalks of celery, sliced

4 cups of Half & Half

1 1/2 cup chicken broth

1 onion, chopped

1/4 cup flour (if necessary)

3 tsbp melted butter (if necessary)

salt and pepper, to taste


Combine all ingredients (minus flour and butter) in a large stock pot over medium high heat. Cook approximately 20 minutes, or until vegetables are tender.


(Optional - I cooked the soup long enough so it was thick enough.) Before service, stir together flour and melted butter and pour into soup to thicken as desired. Stir well before service.


All you need is a slice of crusty, hearty 9-grain or wheat bread. Keep the white starchy stuff away!

Chicken Tikka Masala

My favorite Indian restaurant has the most awesome lunch buffet on the weekends. It's the only time we eat Indian, because it allows us to try a bunch of dishes, without the committment. My absolute favorite is Chicken Tikka Masala (chicken marinated in yogurt and spices then served in a tomato cream sauce), but they only serve it on Saturdays. Unfortunately, they only serve Kheer (a delicious rice pudding Indian dessert) on Sundays - so that is when we go. (Dessert will always win out!)

I decided to attempt to make my own Tikka Masala at home. I must say...this recipe is a winner! If you like Indian/Pakistan flavors, you will love this dish. It's a keeper, and one that I will definitely be adding to my arsenal.

CHICKEN TIKKA MASALA

1 cup plain yogurt

1 tbsp lemon juice

2 tsp cumin

1 tsp cinnamon

2 tsp cayenne pepper

2 tsp freshly ground black pepper
1 tbsp minced fresh ginger

3 boneless, skinless chicken breasts, cut into bite-sized pieces
skewers
1 tbsp butter

1 garlic clove, minced

2 tsp cumin (yes, again!)

1/2 jalapeno pepper, finely chopped (optional)

2 tsp paprika

1 (8 oz) can of tomato sauce

1 cup heavy cream

1/4 cup chopped fresh cilantro
salt, to taste

In a large
bowl, combine yogurt, lemon juice, 2 tsp cumin, cinnamon, cayenne, black pepper, ginger and salt. Stir in chicken pieces, cover and refrigerate for approximately 1 hour.

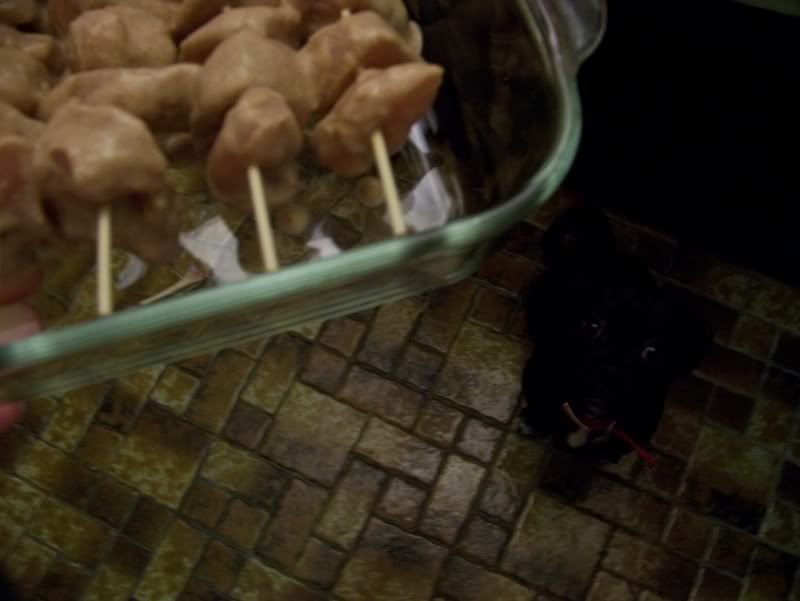
Preheat oven to 400 degrees. Thread marinated chicken onto skewers and discard marinade. Bake in oven for 20 minutes. (Chicken will finish off on the stovetop.)


Meanwhile, melt butter in a large skillet over medium-high heat. Saute garlic and jalapeno for 1 minute. Season with 2 tsp cumin, paprila and salt. Stir in tomato sauce and cream. Simmer on low hear until sauce thickens, about 20 minutes. Add chicken and simmer for another 10 minutes. Garnish with cilantro.


I served this dish with a side of rice that I added shaved carrot and a little cumin to. So good!


The sauce has a wonderful bite that hits you in the back of the throat...if you don't like hot foods, cut down on the cayenne pepper and omit the jalapeno. The sauce is so silky, and the marinade made the chicken so tender. We had absolutely no leftovers, which stinks because it would've made a fabulous lunch!

I could've kicked myself though - this meal definitely needed some Naan and a Mango Lassi to truly "make" the experience.

BTW - Check out my little helper:

Thursday, January 25, 2007

Bagging is an Art

I used to love to go grocery shopping with my mother when I was younger, mainly because I could pick out the perfect shampoo and conditioner for *my* hair - - even though it was used by the whole family. It did involve sneaking it into the cart, then helping my mother unload onto the belt, and bagging - then taking it out and rushing it to the bathroom without her noticing! Tricky, I know. Hey, if you want something, you have to work for it.

My mother has certainly taught me a lot in my lifetime, but the one thing that always stands out in my mind is the way she bagged her groceries. In fact, her method is so engrained onto my brain, that I will pick the long line, and wait - so that I am not rushed by the cashier. Nothing makes me more batty than watching those minimum wage workers stick my raw chicken in with my vegetables, or my cleaning supplies with the fruit. Idiots! Everyone is trying to kill ya out there!

Last night I stopped by the market on the way home. The place was a ghost town, which is so very strange, and threw me for a loop! I grabbed what I needed, and approached the cashiers...there was no one in line at all. As soon as I took my items out of the cart, they were being rung up. I couldn't run to the back of the belt and bag, as I was still unloading. My heart started to race. I knew something would get crushed, or ruined or both, and there was no way that I could stop it!

After all was said and done, my cilantro ended up squished between the liter containers of buttermilk and heavy cream. I found my mango in with the load of canned goods - which they didn't double bag, by the way. It's completely dented now. So much for presentation. Not cool!I could go on and on, but this rant is probably boring to everyone but me.

So, what I wonder is...do baggers have an instructional manual or video to watch during their orientation?

...Is it too much to ask that all of my perishable foods end up in the same bag - especially when I place them on the belt together?

...Can you not pile shit on top of my eggs, dammit!??!?!?! There is a reason I buy 12 and not 10! (I am so writing the manager about that one)

To all of you wonderful baggers out there, please know that I appreciate you more than you know. When I see you bag my meat separately, or put all of my frozen juices together, I want to kiss you...on the mouth...with tongue.

Monday, January 22, 2007

Damn that Rachael Ray!

While I was waiting for Nathan to return home with the cheese pizza we ordered for dinner the other day, I caught a couple of minutes of 30 Minute Meals. I'm not a big Rachael Ray fan - I did start out as one, but the endless giggling, use of EVOO and "mushroom overboard" just sent me...well...overboard. I do admit however, that she has some pretty good recipes that I use every now and then. (I've never gotten them to clock in under 30 minutes, but that's another rant all together.)

I'm sure that Rachael Ray is a good upstanding individual. To me, she is a little overly friendly, and loud. Very loud. I can only imagine that her throat must hurt at the end of the day from all the shouting. She's created herself a little empire of sorts, with the knives, cookbooks, television shows, magazine and all. It's too much, too soon - and so in-your-face. But, I applaud her for being a go-getter. And, I'm terribly jealous of the rock she wears on her finger. But, seriously...Too Cool For School Mixed Tape? Who the fuck buys that shit?

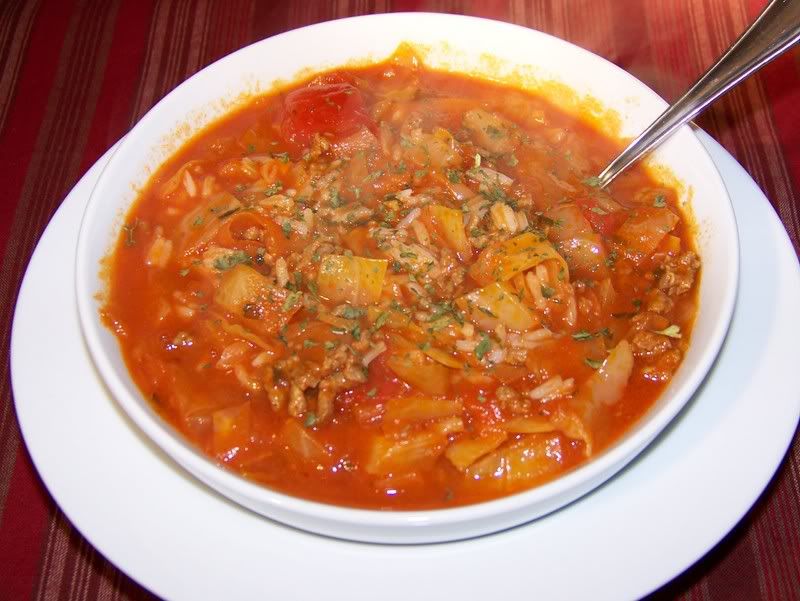
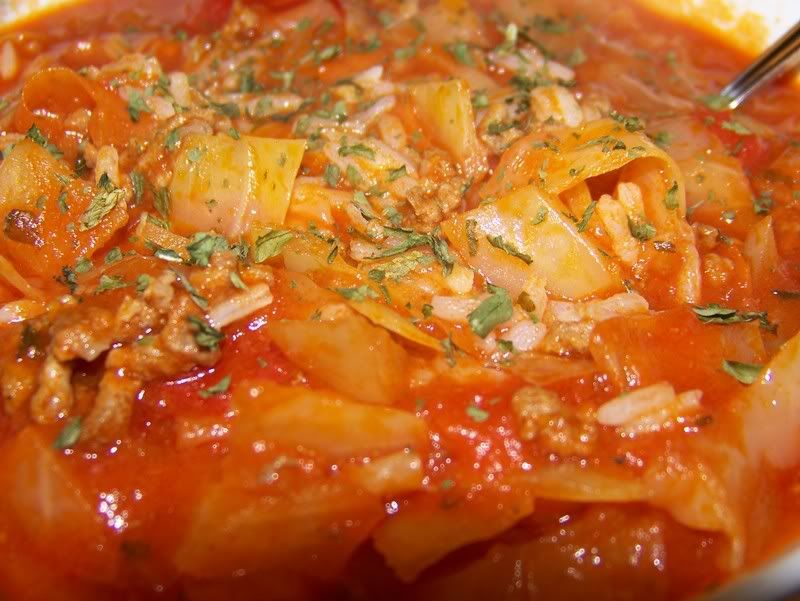
The episode I saw was her "Stuffed Cabbage Stoup." In her words, "it's thicker than a soup, but not as thick as a stew." I was intrigued, and decided to give it a try - especially since I grabbed a head of cabbage the other day at the market for no reason at all.

The recipe itself is easy enough. Looking through my pantry, I noticed that I didn't have all of the ingredients needed - so I did some creative winging-it. You can find Ms. Ray's original recipe here. I will post my changes below.

Rachael Ray's STUFFED CABBAGE STOUP

1/2 head of cabbage, cored and chopped into bite sized pieces (I did not have savoy cabbage as she suggests - - so I used just regular plain green cabbage)
1 lb ground beef
2 tbsp olive oil
2 garlic cloves, minced
1 onion, diced
1 carrot, peeled with a grater and then roughly chopped
1 can of tomato sauce
2 tomatoes, roughly cubes
1 quart of chicken broth
1 1/2 tsp corriander
2 tsp paprika
1 bay leaf
salt and pepper
fresh or dried parsley
cooked rice

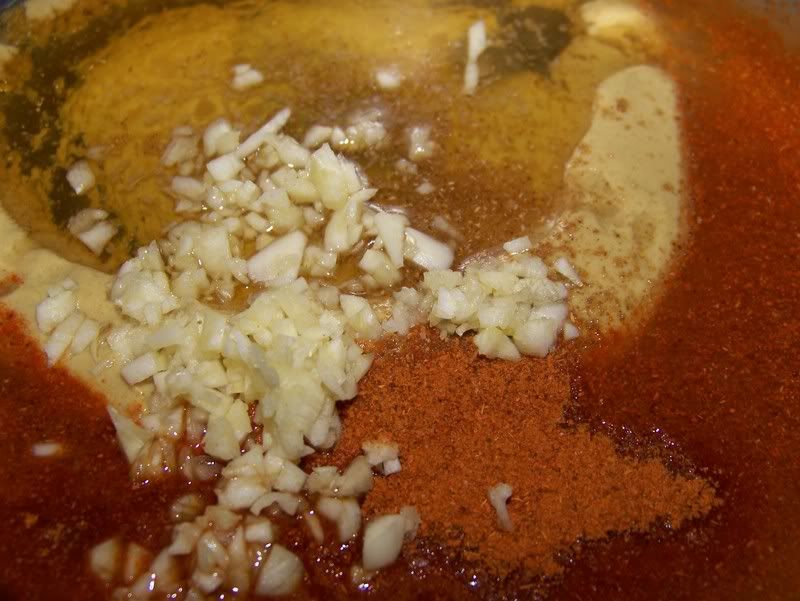
Heat oil in a large skillet over medium heat. Add ground beef. Cook until almost browned. Add onion, garlic and carrot. Continue cooking. Add tomato sauce, corriander, paprika and a bay leaf. Finally add cabbage, then immediately add your chicken broth. Turn heat up to high, and bring to a boil.

Cook for approximately 30 minutes, or until the cabbage is soft-crisp.

Meanwhile, prepare rice as directed - using the 2 to 1 ratio of water to rice.

Add chopped tomatoes to the stoup and cook for another 10 minutes.

To serve, spoon some rice into a serving bowl, then ladel in soup over it. Garnish with a little parsley. RR suggested making the rice on the side, because it you are making a large pot and want leftovers, the rice will remain rice-like, and not become a bloated, soggy mess - it's an excellent tip!


The one thing I would avoid from the episode...there is absolutely no need to make an accompaniment, such as the grilled cheese she had. The stoup is filling enough without adding even more. Even for Nathan, who eats like he has never, ever seen food in his life. I can only imagine how tasty this will be tomorrow for lunch. Thumbs up Rachael Ray!


Weekly Menu

Lots of aggressive cooking this week. I've been in a rut lately, and am excited to bring making good food again!

Sunday - Calzones
Monday - Rachael Ray's Stuffed Cabbage STOUP and crusty bread
Tuesday - Honey-Poppy Seed Cornish Hens
Wednesday - Macadamia Nut Crusted Mahi Mahi
Thursday - Chicken Tikka Masala
Friday - Pizza day
Saturday - Plans to go out!

Recipes and pictures to follow...

Sunday, January 21, 2007

Roasted Garlic

When I moved out on my own, and started cooking for myself for the first time, there were quite a few ingredients that I was afraid of. Garlic being first and foremost on that list! How crazy! It wasn't until YEARS later that I finally conquered my fear of the potent bulb.

Now, I use it in everything. It's a staple in my kitchen, amoung-side the herbs and onions. I don't care if my fingertips smell, or if the garlic aroma is spilling from my pores...it's one of the most necessary and important ingredients in the world of food preparation. (Don't get me started on those prepared jars of garlic - the flavor just is not the same!)

Roasted garlic is one of my most favorite things in the world. Just cut a whole garlic head - exposing the cloves - drizzle with olive oil, sprinkle with kosher salt, and roast in package of foil for 1 hour at 375 degrees. When done, the garlic cloves are as soft as room temperature butter. You can take that garlic and spread it on toasts as an appetizer...or, you can make one of my favorite sides to go with beef...

ROASTED GARLIC SMASHED POTATOES - no measure

equal parts white potatoes and baby red-skinned potatoes
butter
milk
salt and pepper
1 head of roasted garlic - can be made a couple of days in advance, and kept in the 'fridge
chives

Peel and cube the white potatoes. Since the baby red-skinned potatoes are already small, you can scrub then and leave them whole, or cut them in half if they are a little bigger in size. (You want all of your potatoes to be about the same size, so they cook at the same time.) Place potatoes in a pot, and cover with water. Bring water to a boil, and cook until a fork thine easily pierces.

Drain cooked potatoes into a collander. Place the potatoes back into the pot. Add your roasted garlic cloves, salt and pepper, clives, a few tablespoons of butter and milk. Smash until you achieve the consistancy you desire, and all the ingredients are incorporated. I like mine a little more on the chunky side.

And besides all of the health benefits, it will also keep those pesky vampires away!

Tuesday, January 16, 2007

Spice it up

It's funny how I was just bitching about how warm it has been - - the God's above must've heard my little rant, because this weekend has been cooooooooooooold. Bitter cold. With ice and downed power lines! By the end of the week, we are supposed to reach high temperatures in the 20's. Now, this is more like upstate New York in January! I can finally plan some hearty WINTER meals, like beef stew...in fact, I think I will make it tomorrow evening.

I was on a quest last night to warm from the inside...out. A little bit of cayenne certainly did the trick. If you are not a fan of the hotness, turn away! Of course, if you are a fan of "gettin' busy" you may want to tip-toe over to the hot side.

(This recipe is courtesy of InterCourses: An Aphrodisiac Cookbook.)

SEXY SALMON

2 tbsp dijon mustard
1 tbsp honey
2 tsp cayenne pepper
pinch of salt
3 garlic cloves, finely minced
1/4 cup water
salmon filets

Whisk together mustard, water, honey, cayenne pepper, salt and garlic in a bowl. Place salmon in a lightly buttered baking dish, presentation side up. Pour marinade over filets. Chill for approximately 1 hour.

Bake marinated salmon in a 350 degree oven for 25 minutes.

You will feel the burn, right in the back of your throat, and it will make you very, very happy!


I served the salmon with some mac and cheese (made with jalapeno monterey jack cheese) and some beer bread.

Since dinner was a little spicy, dessert became the perfect vehicle to calm those taste buds down a little. For the money, nothing works better than jell-o. Yes, it's a kid dessert...but who are adults really? Big kids!

Ever since I made that ridiculous rainbow jell-o mold, I've been wanting to experiment a little and see what creations I could come up with. Unfortunately, jell-o isn't one of those "on the fly" things...so there is a tiny bit of preparation and planning involved. But, if done right, jell-o can be pretty darn amazing.

PEACH WIGGLY-GIGGLY

1 package of peach jell-o
1 small can of sliced peaches, in juice
1 tbsp sour cream
1 cup boiling water
1 cup cold water*
whipped cream, for topping

Open jell-o packet into a medium bowl. Mix with boiling water, stirring to completely dissolve. Mix with cold water. (* to make this a Peachy Fizzly Wiggly-Giggly, use 1 cup of gingerale instead of water. When the jell-o sets, you will get fizz-like bubbles!) Pour half of the mixture into your serving vessels. Place in the freezer for 10 minutes.

Meanwhile, drain the peaches and cut them up into cubes. Add them to the just beginning-to-set jell-o. Return to freexer for an additional 10 minutes.

Mix in 1 tbsp sour cream to remaining jell-o mixture, until smooth. Carefully spoom over set jell-o mixture. Place entire dish in the refrigerator, and chill for at least 2 hours before serving.


Friday, January 12, 2007

Pasta for one and all

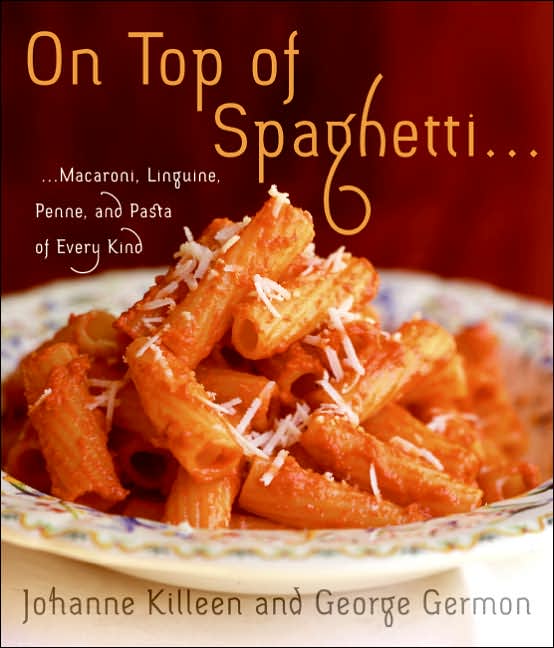
I received On Top Of Spaghetti... for Christmas from my little bro. It has been on my 'gotta get' list for a long while now.


It's a wonderful cookbook filled with very simple recipes with ingredients that are easy to find at your regular supermarket. That in itself, is worth the price of the book...there is nothing worse than having to go all over creation looking for - say - lemon curd. (A task I took on not too long ago, and failed at...I ended up making it myself!)

The one thing that stinks a bit is that there are not a whole lot of pictures. The author's, Johanne Killeen and George Germon, placed about 12 full color glossy pictures in the center - - but I personally prefer cookbooks that have a picture of each recipe. I'm visual in that way.

However, I was absolutely delighted in the commentary that follows from every single page turn. There's a back story for each recipe - - and that makes me smile. I love "listening" to people's food stories. I can't wait to make my annual trip to Rhode Island to dine at their restaurant, Al Forno, in my favorite city of Providence.

Prepare for a slew of pasta recipes!

Thursday, January 11, 2007

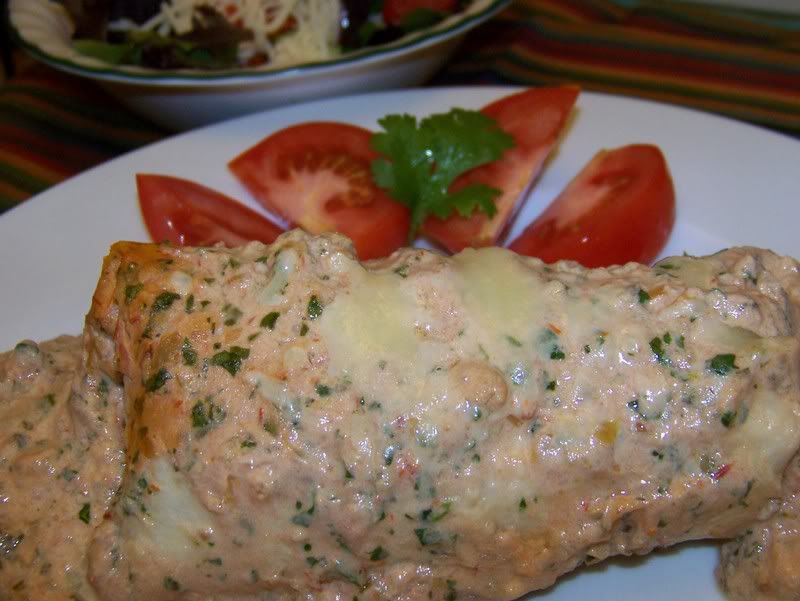
Sour Cream Enchiladas

Patti gave me a wonderful recipe a couple of years back, that I immediately filed away in my "to make again" box. It's creamy, filling and flavorful, and a great use of leftover chicken.

PATTI'S SOUR CREAM ENCHILADAS

Flour tortillas
1 jar of salsa verde (I use red salsa, because I can't find the other)
1 onion, finely chopped
2-3 cups of cooked, cubed chicken
1 small tub of sour cream
shredded mozzarella cheese
a couple handfuls of fresh cilantro (flat leaf parsley also works well if you do not like cilantro)

Preheat oven to 350 degrees.

In a food processor, combine 1/2 jar salsa, sour cream and cilantro until smooth. Set aside.

In a medium bowl, combine chicken, onion and the other 1/2 jar of salsa. Mix until combined. Seat aside.

Place a cup of the sour cream mix in the bottom of a 9x13x2 inch baking dish, spreading evenly so the entire bottom is coated completely. Take one tortilla, and place about 1/2 cup of the chicken filling in the center. Fold the tortilla sides in, and roll up, enclosing the filling. Place tortilla, seam side down, in the baking dish. Repeat as necessary.

Pour the rest of the sour cream mixture over the wrapped tortillas. Cover with shredded mozzarella cheese. Cover entire dish with foil, and bake for 20 minutes. Remove foil, and resume baking for another 10 minutes, until cheese is melted, and sauce is bubbly.

I served ours with a nice house salad.


If you haven't done so, go and check out Patti's food blog!

Tuesday, January 09, 2007

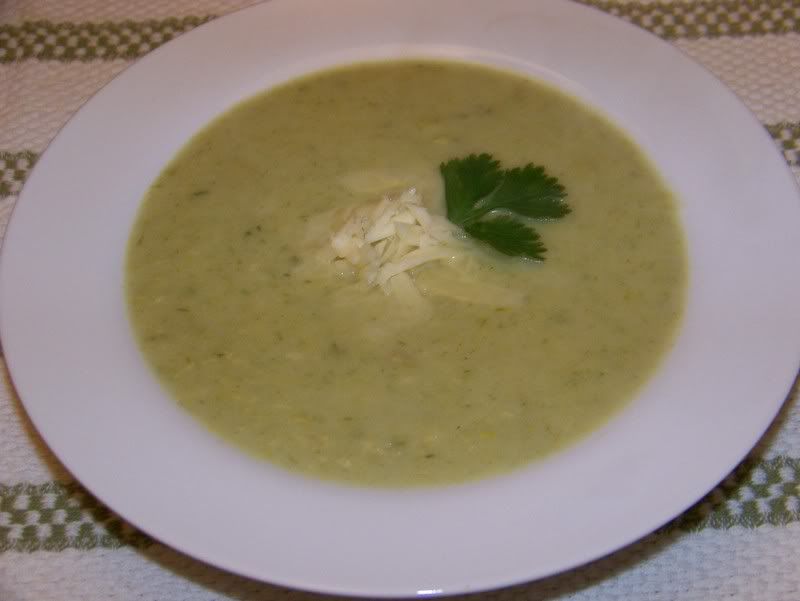
Creamy Leek and Potato Soup

It's winter. I have to keep reminding myself that. It's pretty hard to wrap your brain around the idea of winter when it is almost 70 degrees out...and I'm not talking about living in Florida. I'm in NYS people! As a friend as recently said "Global Warming Rocks!" (Not really.)

Winter is a time for soup, stews and all things hearty. But, when it's 70 degrees all you want to eat is fruit salad and popsicles! But, I decided to tough it out and make something new - throw caution to the wind, if you will. Heck, even though it is feels like Spring...soup is on the menu, and I am not changing it!

Funny thing is, when I took the dog out for a walk after dinner, it was COLD! My soup brought in the season!

CREAMY LEEK AND POTATO SOUP

2 leeks (white and green parts), chopped and cleaned
1 small onion, diced
3 tbsp olive oil
1 tbsp butter
1 garlic clove, finely minced
5 russet potatoes, peeled and diced into cubes
16 oz. (1 box, or two cans) of chicken stock
1/2 -1 cup of half & half
salt and pepper, to taste
pinch of nutmeg

In a large stock pot, heat oil and butter. Add onions, garlic, leeks and potatoes, and cook - stirring continually - until onions are translucent. Add chicken stock and bring entire mixture to a boil. Cook until potatoes are fork tender. Take off heat.

Use either an immersion blender, or a food processor, and blend all contents (I received an immersion blender for Christmas, and it is fabulous!!!! Thanks mom!) into a smooth consistancy. Add enough half & half to achieve the color and texture you would like. Season with salt, pepper and nutmeg. Bring mixture back to a boil, and serve.

Garnish with fresh chopped herbs, or a dollop of sour cream. I used a little grated cheddar for some bite.


I can not believe the flavor that the leeks brought to this soup - besides giving the dish a nice mellow green color. (I guess you can only use the white part of the leeks if you want the soup not to take on that verdant color.) The potatoes also made the soup very filling, and the leeks gave it this sweet semi-onion flavor that was very subtle and nice on my palate.

This is one of those dishes that you want to package up and bring to someone to try. I had to hold myself back from showing up at my mother's house with a tupperware full of soup she can't eat (due to her wacky diet)!

Monday, January 08, 2007

Weekly meal planning

Sunday - Chicken Divan
Monday - Creamy Potato and Leek Soup
Tuesday - Patti's Sour Cream Enchiladas
Wednesday - Tarragon Basil Salmon (we're trying this out for a friend!)
Thursday - Pesto Lasagna Roll-Ups
Frisday - Pizza Day
Saturday - Fried puppy legs (depending on how potty training goes this week)

Chicken Divan

Me: Hey, what do you want for dinner?
Nate: I don't know...whatever you want to make.*
Me: Seriously?! You don't have any opinion?!
Nate: How about that chicken dish that was your grandmother's favorite.**
Me: Chicken Divan? Alright. I have to stop at the store though.
Nate: Yeah. I like that meal.

*This is Nathan's normal response.

**This is also Nathan's normal response. I'm not sure if he just really doesn't care what he eats, or he has a really bad memory and can only remember this one dish when grilled for ideas. This is seriously his only suggestion WHENEVER I ask his opinion. Frustrating!

Usually I have all the ingredients for this meal on hand, since it is all canned and frozen food. Not this time...I had to make a little run to the grocery store. I wish I had paid closer attention to my pantry however, since I had to make a second trip to pick up an essential element of the dish - the rice. How I ran out, I'll never know. It's a darn good thing the store is only a couple of blocks away. This dish is the ultimate in comfort food. Whenever I want to remember my Meme, I make this. Whenever I feel under the weather, I make this. It does take a little time (to precook some of the ingredients) but it is soooo yummy to my tummy!

Without further ado - try not to focus on the fat content in this recipe, or the artery clogging ingredients...I promise, it is well worth the risk:

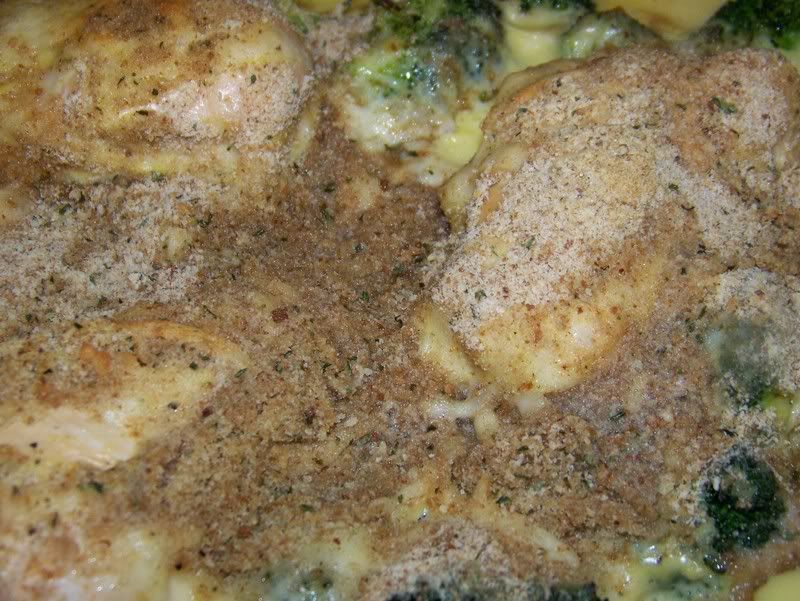
CHICKEN DIVAN

4 boneless, skinless chicken breasts
1 large (or 2 small) packages of frozen broccoli spears (you can also use fresh broccoli)
2 cans cream of chicken condensed soup
1/2 cup mayo
1 cup milk
1 tbsp curry powder

1 cup of shredded cheddar cheese
1 cup Italian style bread crumbs
2 tbsp melted butter
black pepper, to taste

Preheat oven to 350 degrees.

Meanwhile, bring a pot of water to a boil. Cook broccoli spears until crisp tender. (Do not overcook them, as you will finish them off in the oven!) Remove broccoli and arrange on the bottom of a 9x13x2 inch baking dish. Place raw chicken in the same water, and boil until completely cooked through. Take chicken out, and arrange on top of the broccoli.

In a large bowl, mix together soup, milk, mayo, curry powder, pepper and 1/2 cup cheddar cheese. Pour evenly over chicken and broccoli. Top with the rest of the cheddar cheese, and breadcrumbs. Finally, drizzle the melted butter over the top of the whole mixture.

Bake 40 minutes. Serve over prepared white rice.


I've also made this dish as a side, cutting the recipe in half, and omitting the chicken.

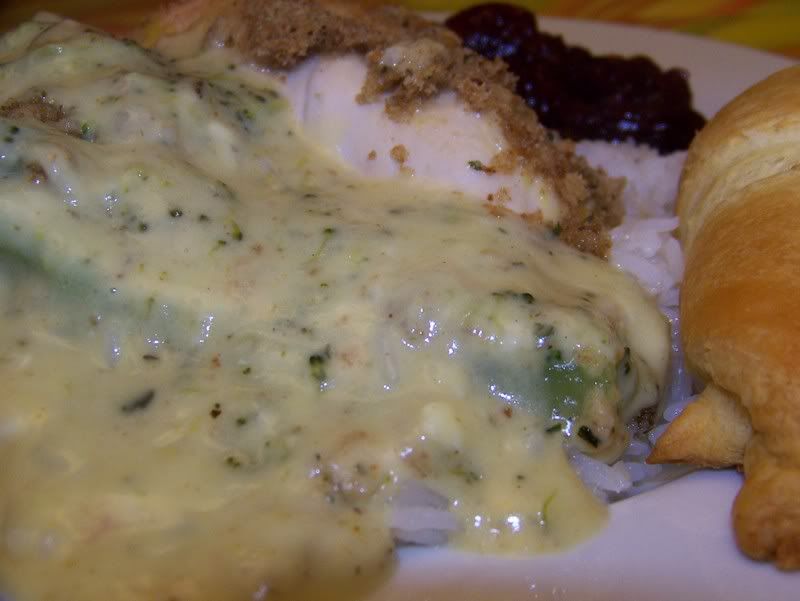
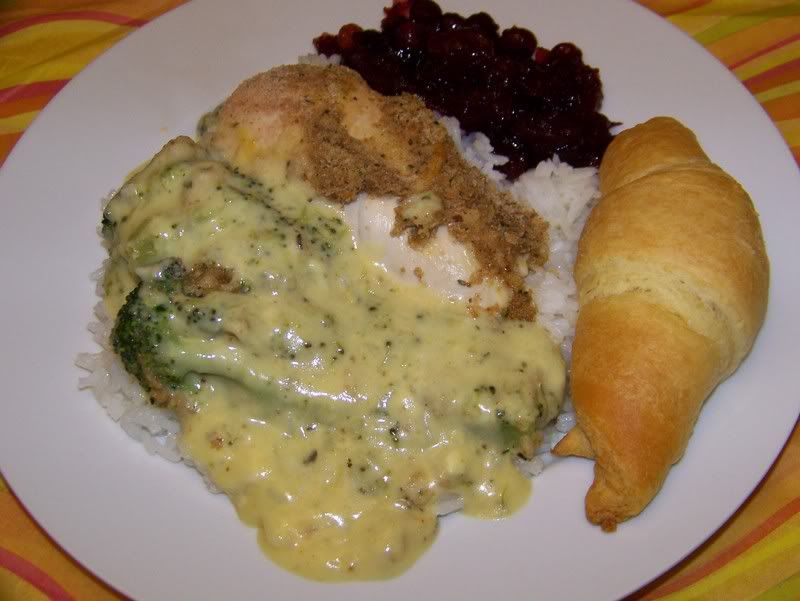
Look how creamy!


It's absolutely delicious, and so satisfying. I paired it with some whole cranberry sauce (can) and a butter croissant (Pillsbury).

Friday, January 05, 2007

Punk'd!

I have fond memories of my grandmothers cooking when I was young. Big spaghetti dinners, awesome mashed potatoes, her creamy and delicious cream of broccoli soup...when I think of her memory, I often relive those dinners with the whole family. (Her house is also where I partook in my first official food fight!)

Last night was our soup and sandwich night, and when I was deep in menu planning on Sunday, I immediately thought of my Meme's cream of broccoli soup. When I asked my mother if Meme used cream, milk or half and half for the base, she just laughed. I was so confused! My mother got up from her chair, walked into the kitchen and got out her recipe box. As she pulled the recipe out, she began to laugh again - and said "Your memory is skewed...your grandmother hated cooking, and anytime she could open a can, she would."

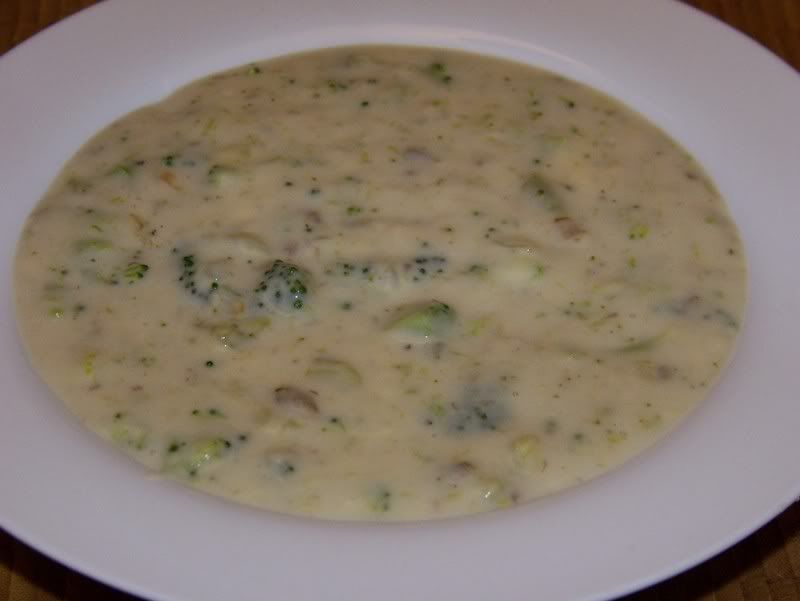
Then, I looked at the recipe: 2 cans of cream of broccoli soup, 2 cans of cream of mushroom soup, 1 small can of mushrooms, 2 cups of milk and a bag of frozen broccoli.

I was defeated!

This wonderfully delicious soup that I thought my grandmother made from scatch, was actually made by Campbell's, and came out of a freakin' can!

I pulled myself up by the bootstraps, went home and made that gosh darn "recipe" - - and you know what? It was FABULOUS! Sure, it's a major short cut, but I did make it a little more special by adding a chopped onion, which I sauted in olive oil, and some fresh chopped broccoli florets - instead of the frozen variety. I paired the soup with a BLT wrap.

Thursday, January 04, 2007

BBQ Chicken Bundles

There are more than 24 billion chickens in the world. (My bit of fact finding for the day!)

When we were little, it seemed like we ate chicken - in some form - every single day for dinner. My mother would say "there are so many ways to cook it" if we dared to complain in her presence. She was, and still is, so wise.

Last night, I made a new recipe I found on www.landolakes.com.

BBQ CHICKEN BUNDLES OF GOODNESS

boneless, skinless chicken breasts
2 pieces of uncooked bacon, per chicken breast
4 cheddar cheese slices
1/2 cup of your favorite BBQ sauce

Preheat oven to 400 degrees.*

Prepare the chicken by
butterflying the breast to open it up. Place a slice of cheddar cheese on the inside of the breast, and carefully fold breast around itself, to create a little bundle. Criss-cross two slices of bacon around each chicken and cheese bundle. Secure bacon with a toothpick.

Cook in the oven for 30 minutes. After the 30 minute mark, baste each bundle with BBQ sauce. Rebaste every 5 minutes, until your total cooking time reaches 50 minutes. Serve warm!

*You can also prepare this dish on the grill, using the same method. Enjoy those famcy grill marks! Breasts can also be prepared in advance, and kept in the refridgerator until you are ready to cook. This will cut down on prep time substantially.


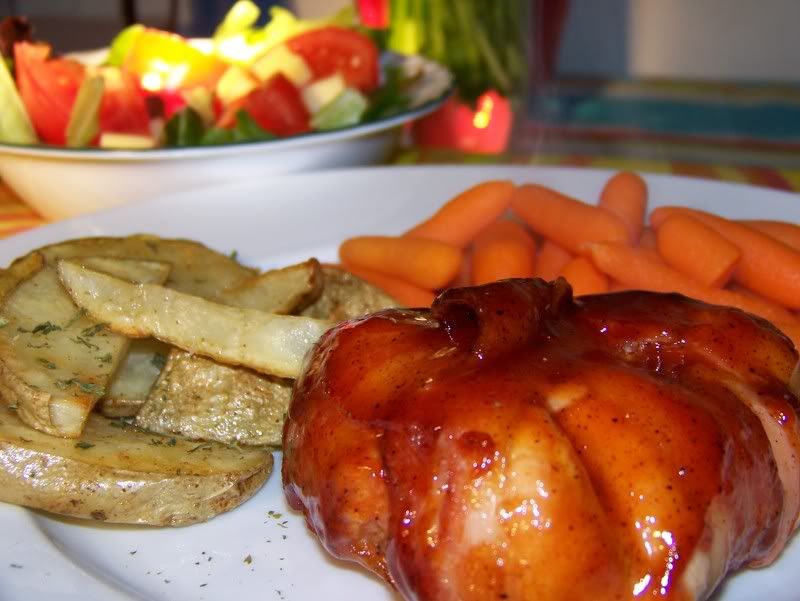
I can not believe the flavor that came out of this small bundle of goodness! The bacon was still a little soft, and so easy to slice through with a butter knife. And, that cheesy center added that extra touch of suprise that sent Nathan into heaven. I was lucky enough that none of the cheese escaped during the cooking process due to my successful wrap job. The chicken bundle literally looked like a little package!

The fragrance that graced the house the rest of the evening was to die for. There is nothing like bacon.

Tuesday, January 02, 2007

Weekly Menu Planning

Tuesday - Sweet Sausage and Peppers with Pasta
Wednesday - BBQ Chicken Bundles with Garden Salad
Thursday - BLT Tortillas and Broccoli and Cheese Soup
Friday - Beef Kabobs with Horseradish Sauce over Rice Pilaf
Saturday - Homemade pizza at a friend's house
Sunday - I wish I knew!!!

Monday, January 01, 2007

Pasta - 2 ways!

Two different pasta dishes graced our menu after the holiday food spectacular. They are both easy, very flavorful - and are finished as soon as your pasta is done. Rachel Ray has nothing on these 15-minute meals!

Pasta #1:

PASTA PUTTANESCA

1 lb pasta of your choice (I used spaghetti)
3 anchovy filets - packed in oil
1 medium onion, diced
1 garlic clove, finely diced
1 small jar of artichoke hearts - in oil
1/2 cup small green (pitted) olives
1 medium can diced tomatoes
1/2 cup tomato sauce
1/4 cup capers, rinsed
2 tbsp olive oil
dried parsely, basil, oregano, black pepper and red pepper flakes - to taste


Prepare pasta as directed.

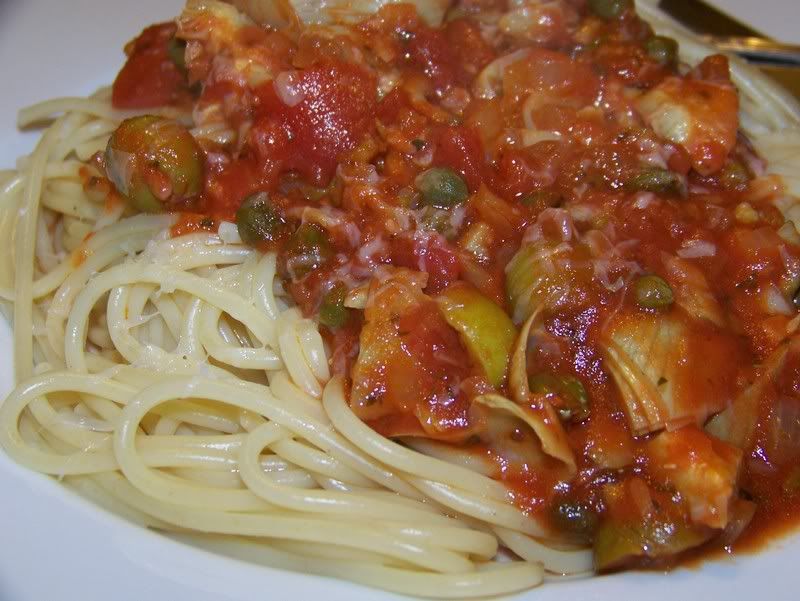
Meanwhile, heat olive oil in a large skillet. Add anchovy filets - using a wooden spoon to mash the filets. (They will slowly disappear, leaving a nutty, salty flavor.) Add onion and garlic and cook until onions are translusent. Add capers, green olives, artichokes, diced tomatoes and tomato sauce, stirring to combine. Season with your favorite herbs.

I added a little red pepper flake for some heat - but that is entirely optional. Make sure you taste your ragu before you add any salt though, since all of the ingredients have a salty taste to them...for my palate, I didn't need additional salt seasoning.

Serve over your favorite prepared pasta. This makes a great alternative to regular old spaghetti and tomato sauce.


******************************
Pasta #2:

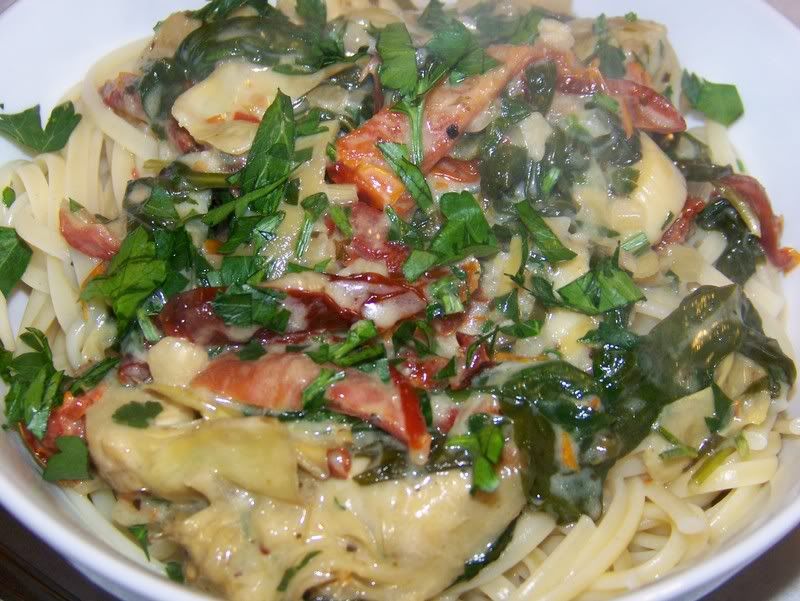
PASTA WITH SCALLOPS

Pasta of your choice - I used fettuchini
1 tbsp olive oil
1 tbsp butter
16 medium scallops
1 small jar of artichoke hearts
1 handful of baby spinach
1/4 cup sundried tomatoes, cut into strips
1 medium onion, diced
1 garlic clove, finely diced
1/4 cup vermouth
1 cup chicken stock/broth
3 tbsp heavy cream
1 tbsp flour (if needed)
salt and pepper, to taste

Prepare pasta as directed.

Meanwhile, melt butter and oil in a large skillet. Add prepared scallops (rinse scallops in a bowl, debeard them, and pat dry with a paper towel) to the butter mixture. Immediately, add garlic and onion, stirring to combine. Cook until onions are translucent, then add vermouth, and reduce until all of the alcohol is cooked out. Add sundried tomatoes, spinach and artichokes.

Once the spinach wilts, add chicken broth and reduce some. If too thin, add a little flour to thicken - finish off with the heavy cream. Serve over pasta. Garnish with some fresh parsley, if desired.


Both recipes are (as Nathan called them) "restaurant worthy." He is so kind!